Posts filed under ‘How To’s’
Summer Fun for the Kids
To help celebrate the Summer Solstice, I thought I would share with you a few fun child enriching and parent (grandparent) sanity-saving activities.
Pretzel Sparklers
- 1 package pretzel rods
- White Chocolate (chips)
- Sprinkles (color coordinating with the holiday)
Pour the Red, White and Blue (4th of July) sprinkles into a small shallow dish.Melt the chocolate chips in the microwave, be careful about the length of cooking, try 35 seconds and so on until melted. Dip the ends of the pretzels into the chocolate about halfway. Roll the coated ends in the sprinkles. Let dry on a sheet of wax paper.
Banana Pops
- 2 medium bananas, peeled and cut in half
- 2 teaspoons of syrup or honey
- 1/4 cup of crispy rice cereal
- 1 tablespoon toasted coconut
- 1 tablespoon finely chopped nuts (unless your child is allergic)
- 1/4 teaspoon apple pie spice
- 4 craft sticks
Insert one craft stick into the bottom of each half banana. Place on baking sheet in freezer for about an hour or so, until the bananas are firm. In a shallow dish mix the other dry ingredients, cereal, coconut, nuts, spices. Brush each banana with the syrup or honey and then roll in the cereal mixture until coated. Wrap each banana pop with plastic wrap; return to freezer. Freeze until frozen. Store in freezer for 2 days. A good morning activity for the kids and in the hot afternoon they can have their Banana Pops.
And what’s Summer without bubbles!
Color Bubbles
- 1/3 cup no-tear baby shampoo (Buy at the $1 Shop)
- 1 1/4 cup water
- 2 teaspoons sugar
- 1 drop of food color
Mix all together and pour into an old bubble container. Can pour it into a shallow dish for dipping a large bubble wand (also, at the $1 Shop).
Then after a day of eating, playing, running, swimming, sandbox playing, swinging, fumping (Alex’s jumping), etc., put the kiddos in the bath and let them play with…….
Fantasy Foam
- Gentle Shaving Cream (test on inside of child’s arm for any reaction)
- Liquid Food Coloring, various shades
- Muffin Tin or Small Plastic Containers
Put the shaving cream into the cups and tint each one with the food color. Just takes a few drops, don’t want a blue smurf in the bathtub! Let the young artists create!
Let’s celebrate Summer! And for after the kids are in bed asleep, check out the Porch Swing Ice Tea recipe in my last post.
Great Summer Recipes
Here are two great summer time appetizers when the living is easy!
Cowboy Caviar
- 1 (11 ounce) can white shoepeg corn, drained
- 1 (15 ounce) can black beans
- 2 firm-ripe avocados, finely chopped
- 1 large tomato, seeded and diced
- 1 bunch green onions, thinly sliced
- 1/4 cup olive oil
- 1/4 red wine vinegar
- 1 garlic clove, minced
- 3/4 teaspoon salt
- 1/2 teaspoon pepper
- 1 teaspoon cumin
- Tortilla Chips (organic, baked, whatever you enjoy)
- Combine all ingredients (except chips) and toss together gently.
- Serve room temperature with tortilla chips.
- Avocado will turn brown if sets to long, could leave the avocado out until just before serving.
Great with a tall Corona Extra with a slice of lime!!!
Fruit Salsa with Cinnamon Chips
Cinnamon Tortilla Chips
- 1 cup sugar
- 1/4 cup ground cinnamon
- 1/2 cup lemon-lime soda
- 1/2 cup water
- 1 package flour tortillas
- Combine sugar and cinnamon in a bowl/mix well.
- Combine soda and water in a bowl; stir.
- Cut tortillas into triangles. Brush lemon soda mixture over one side of tortilla; then coat with sugar mixture.
- Arrange on a foil-lined baking sheet. Bake at 475 degrees for 5 to 7 minutes or until bubbly. Remove the tortillas to a wire rack to cool.
Fruit Salsa
- 3 or 4 large Granny Smith Apples, chopped finely
- 2 Kiwifruit, chopped
- 1 quart fresh strawberries, chopped finely
- 1/4 cup packed brown sugar
- Combine chopped fruit, orange juice and sugar; mix well. I chop by hand or use your food processor until coarsely chopped.
- Cover and chill 8 to 10 hours before serving.
This would go great with a Strawberry Daiquiri! I guess you can tell that I am looking forward to hot summer days and cold liqueur in my hand!
Parsimony Friendship
Remember the tiny clothespins I bought at the $1 store? I mentioned that I had a project in mind using them, well, I am mentioning it now! These dish soap aprons were my Grandma Bertha Belles. I remember the aprons being on the Ivory Soap and she changed the aprons every week. I really like the seersucker 40’s fabric apron, don’t you!

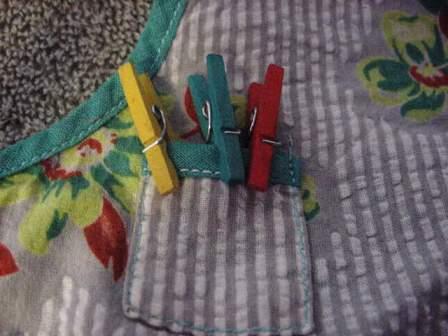
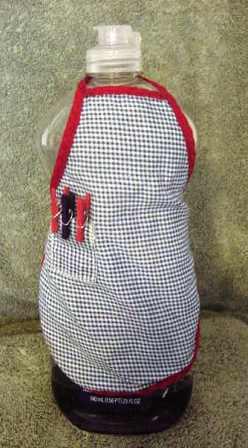
These aprons can be made from scraps of material and seam binding in your stash. These make great housewarming or bridal shower or welcome to the neighborhood gifts. I plan on putting a couple in a basket with dish soap(environmental friendly), scrubbers (made from strips of netting), kitchen hand towels, nice hand lotion, a coouple of delicious tea bags and a cup. There are many more “homey” (no, not like in my homies) items I am sure that you can think of to add to the basket. If you want the pattern and three clothespins, send a $1.00 (to cover postage, envelope). I have how to make PDF files on my list for learning, but I cannot PDF the clothespins to you. Simply just email me and I will send you my address.
Friendship Breads and Starter
Have you heard of a Friendship Starter for baked goods? This recipe comes from the Amish, it is based on their traditional sourdough baking, sweeter tho’. The friendship part comes from sharing the starter as it grows. Often, the starter is given to a friend with the recipes and a loaf of friendship bread. While I cannot give you a loaf of bread, I can give you the record keeper sheet and the recipes and thoughts of friendship. Just drop me a email, and I will send the attached recipes so you can print them. I had a starter at one time but it was forgotten and I did not keep up. I found the starter recipe a couple of months ago and decided to try it again. Here’s is the recipe to the simple Friendship Starter.
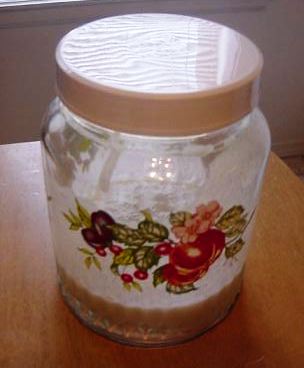
Friendship Starter
- Day 1 Mix 1 cup milk, 1 cup flour and 1 cup sugar in a glass/cereamic bowl or jar. Be sure to stir with wooden spoon. Cover loosely with plastic wrap. Leave on counter.
- Days 2-5 Leave it alone to bubble.
- Day 6 Stir once.
- Day 7 Feed with 1 cup sugar, 1 cup flour and 1 cup milk. Mix first, then add.
- Days 8-9 Stir once each day.
- Day 10 Feed with 1 cup sugar, 1 cup flour and 1 cup milk. Mix first, then add. Today you can take out 1 cup of the starter for baking and 1 cup to give to a friend. Continue to maintain the starter.
Maintainng Your Starter: Leave out on counter. Stir it once every day and feed it every 5th day with the 3 ingredients-1 cupsugar, flour, milk. I am going to keep track of the every five days on my kitchen calendar. A pattern of every five days is easy, 5th, 10th, 15th, 20th, etc. You may have to skip a day or so, that will be fine. The starter can be used any day you want for baking or to give to a friend, just be sure to leave a cup in the starter. Managing your starter is not complicated, if you do not need any starter, just take some out and discard it. Every month transfer your starter to another container and wash and scald the container before putting the starter back in. I just use the boost heat setting on my dishwasher.
I have made a record keeper where you can keep track of the starter. I also have other recipes that can be made from the starter, such as, Fruit Nut Friendship Bread, Pancakes and Cinnamon Rolls. There is a Fruit Starter, also, which makes yummy moist cakes and bread.
Weekly Thrifting Pleasures
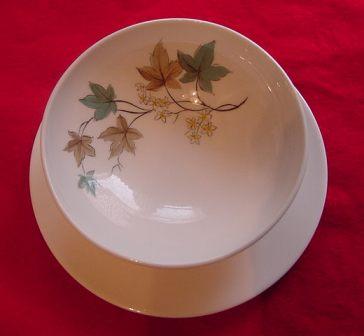
This is a fantastic bowl that I will use for dips, like Summer Fruit Dip. The wonderful leaf pattern will be prefect to set in the center of a white platter for my famous (well, in my husband’s family, anyway) Fall Caramel Apple Dip. I use golden and red delicious apples for a nice color contrast. For you collectors the bottom reads, Carefree True China by Syracuse, Woodbine(pattern), Made in USA.
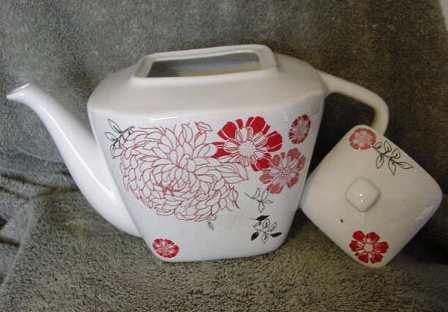
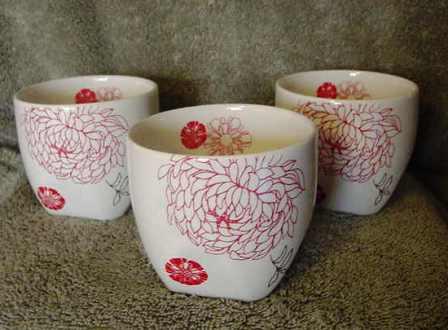
This Teapot Set is made by Target Home Neo Asia, the pattern is Indonesia. The colors and flower design is honorable!
Friendship and recipes are always good to share!
How to Make Thumb Pin Cushions
Well, I promised to show you how to make the Thumb Pin Cushions. This is my first “how to”, so if you have any questions, please ask me!
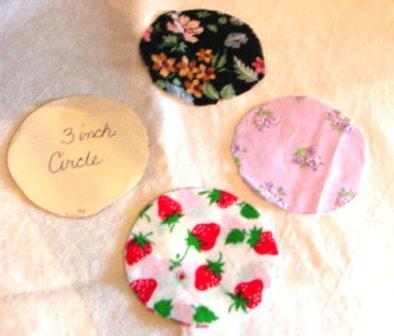
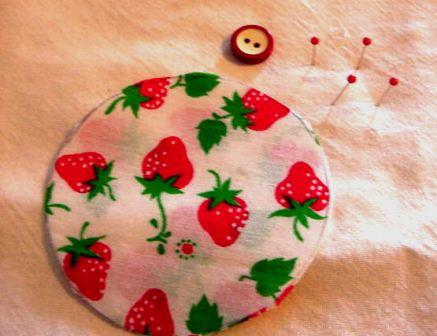
Step 1. Cut a template from cardstock. Template: 3inch circle. Use the template to mark the circles on the fabric. I use a #2 pencil to trace.
Step 2. I like to use small prints. Next run a gathering stitch around the outside edge of fabric, basically you are making a stuffed yo-yo. Gather up the edge but do not cut your thread. Stuff the gathered yo-yo, until firm. Now use the needle and thread to finish gathering and securing the yo-yo.
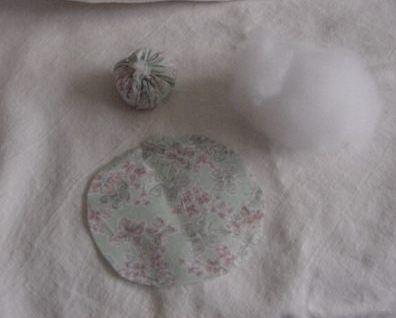
Step 3. Drill two small holes in the top of bottle cap, approx. 1/4 inch diameter. I have use a electric drill and a hand push-type drill to make the holes. Cut a piece of elastic 5 1/2 inches in length. Insert both ends of elastic into holes, pull through and adjust to your thumb size. Make a knot in the elastic; cut off loose ends of elastic.
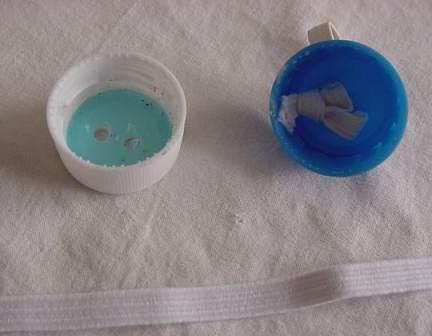
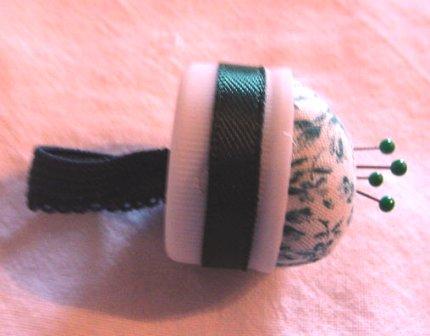
Step 4. Put a good size pool of hot glue in the cap and then push the stuffed yo-yo into the bottle cap. Decorate the outside of your bottle cap with matching ribbon; hot gluing the ends on the cap. Then cover the joining ends with a button, bow, or whatever. Now put 4 to 6 small colored ball pins into the finished pin cushion; I use matching ball pins to fabric. It’s done!
Here are some examples of the color themes I have used. Strawberry print with green or red ribbon and a vintage red button, with red ball pins.
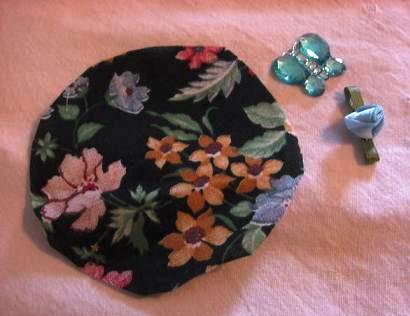
A lilac flowered print with either green/lilac flower edging or a lilac bow. Use white ball pins.

A dark green flower print with blue ribbon and a blue ribbon flower/blue butterfly.
I sell these thumb pin cushions for $1.00 at the flea market where I work (in a glass case). When I go to an estate or garage sales, I pick up the little pieces of small print and scraps of ribbon for this project. I sit and make the pin cushions when I am watching tv in the evening. I usually accomplish some of the steps in mass, such as, drill the holes in a bunch of caps, cut circles, sew and stuff the yo-yo’s, and cut the elastic. Then I can sit down with the mass of parts and make the finished product. I also use colored elastic, which I pick up at sales or buy in bulk lots on Ebay.
Speaking of Flea Markets, I am currently putting together a small book on the resale trade. The often changed and temporary title is “The Art of Resale by a Insane Crazed Addict”. I grew up following my mother around at garage sales, church sales, etc. in the 60’s, when thrifting wasn’t cool! My daughters grew up following me to garage sales, church sales, etc. in the 1980’s, thrifting still wasn’t cool! However, they were dressed in the latest fad clothes (you know like Guess Jeans, Slouch Socks, etc.) that I picked up for pennies on the dollar (being a single mother and all). And now in 2000’s they are taking their daughters to garage sales, church sales, etc, BUT now it’s cool!! And I think that is fantastic!! Our consumer society throws away too many good items, most which are barely used.
Remember that someone you know needs a smile! Maybe a hug!


